Sanrasxz

joined 1 year ago
 

Introduction

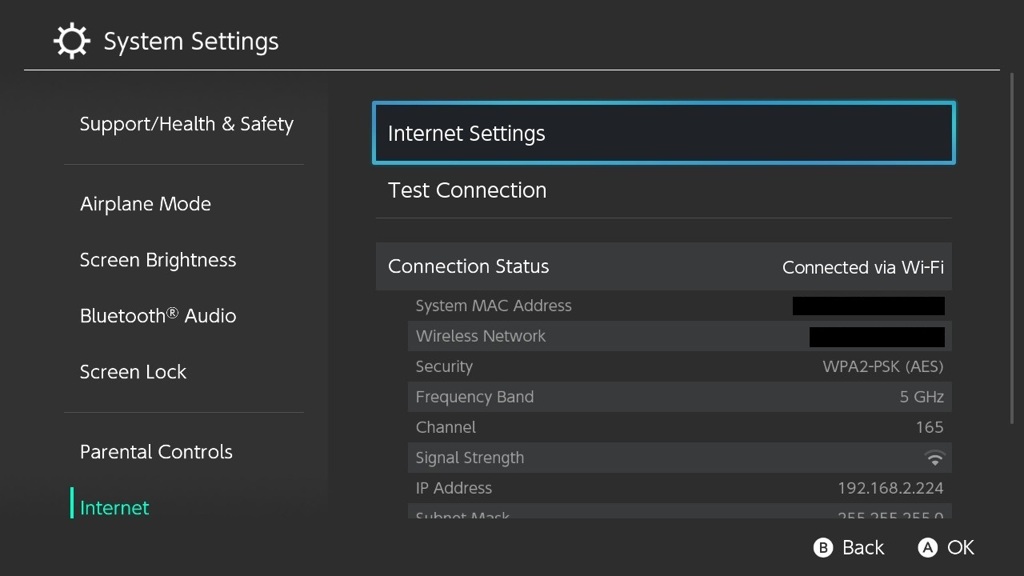
Japanese Switch consoles (XAW, XKJ, XTJ) are unable to use higher 5GHz channels due to their WiFi chipsets being set to the JPN WiFI region in PRODINFO which restricts their use. You can manually change this region code to unlock the channels and use them in the USA or EU if you have an imported Japanese console.

This guide is meant for use with emuMMC, but it can be followed on sysMMC as well by mounting eMMC RAW GPP in Hekate to NxNandManager instead of the SD card's emuMMC. Be careful and keep PRODINFO backups if messing with PRODINFO on sysMMC.

Getting Started

We'll be using NxNandManager, and HxD to edit the PRODINFO. If you haven't dumped your console's prod.keys yet, you will also need to do that. Use your own console's prod.keys, this is important!

Downloads:

Preparations

  1. Download NxNandManager, and extract the zip file.
  2. Download and install HxD by running the setup.exe after extracting its zip.

If you haven't dumped your keys yet, I'll go over it quickly here. You can skip this if you have already dumped your console's keys.

  1. Download the latest release of Lockpick_RCM.bin, linked above.
  2. Place this file in /bootloader/payloads on your SD card, and boot into Hekate.
  3. Go to the Console Info tab, and tap the Lockpick RCM button.
  4. Click the power button once in Lockpick to dump keys from sysMMC, then click power again, then highlight the option to power off and click power button once to confirm.

Dumping PRODINFO

We are now ready to go. First, we will dump the PRODINFO that needs editing:

  1. Take out the SD card from your Switch with emuMMC and insert it into your PC.
  2. Run NxNandManager.exe on your PC and grant Admin when requested.
  3. In NxNandManager, go to the Options tab and click Configure keyset
  4. Click Import Keys From File, and navigate to /switch on your SD card. Select prod.keys and hit Open. Then hit the Save button in the Configure keyset window. [Reference Picture]
  5. Click File in NxNandManager, and select Open Drive
  6. Select your emuMMC partition on your SD. (This will be about 29GB on V1 and V2 consoles, and about 59GB on OLED consoles.) [Reference Picture]
  7. Select PRODINFO in the partition list.
  8. Select the Advanced Copy button on the right pane.
  9. Select Decrypt in the options, and set a file path to where you want to dump the file. (Any working directory you want to use is fine). [Reference Picture]
  10. Hit Dump to dump the decrypted PRODINFO to your PC.

Editing PRODINFO

  1. Run HxD on your PC, and open the dumped PRODINFO.bin file.
  2. In HxD, click on the Search tab and select Go to. Input 0080 and hit OK.
  3. Copy the North America WlanRegionCode data, provided below:
01 00 00 00 00 00 00 00 52 32 00 00 00 00 00 00 00 00 00 00 00 00 00 00 00 00 00 00 00 00 00 00 00 00 00 00 00 00 00 00 00 00 00 00 00 00 00 00 00 00 00 00 00 00 00 00 00 00 00 00 00 00 00 00 00 00 00 00 00 00 00 00 00 00 00 00 00 00 00 00 00 00 00 00 00 00 00 00 00 00 00 00 00 00 00 00 00 00 00 00 00 00 00 00 00 00 00 00 00 00 00 00 00 00 00 00 00 00 00 00 00 00 00 00 00 00 00 00 00 00 00 00 00 00 00 00 00 00 00 00 00 00 00 00 00 00 00 00 00 00 00 00 00 00 00 00 00 00 00 00 00 00 00 00 00 00 00 00 00 00 00 00 00 00 00 00 00 00 00 00 00 00 00 00 00 00 00 00 00 00 00 00 00 00 00 00 00 00 00 00 00 00 00 00 00 00 00 00 00 00 00 00 00 00 00 00 00 00 00 00 00 00 00 00 00 00 00 00 00 00 00 00 00 00 00 00 00 00 00 00 00 00 00 00 00 00 00 00 00 00 00 00 00 00 00 00 00 00 00 00 00 00 00 00 00 00 00 00 00 00 00 00 00 00 00 00 00 00 00 00 00 00 00 00 00 00 00 00 00 00 00 00 00 00 00 00 00 00 00 00 00 00 00 00 00 00 00 00 00 00 00 00 00 00 00 00 00 00 00 00 00 00 00 00 00 00 00 00 00 00 00 00 00 00 00 00 00 00 00 00 00 00 00 00 00 00 00 00 00 00 00 00 00 00 00 00 00 00 00 00 00 00 00 00 00 00 00 00 00 00 00 00 00 00 00 00 00 00 00 00 00 00 00 00 00 00 00 00 00 00 00 00 00 00 00 00 00 00 4E C4
  1. Go back to HxD, and highlight range 0080 through 020F in HxD. [Reference Picture]
  2. Right click on the highlighted range, and select Paste write. [Reference Picture]
  3. The data should be written to the selected range, and it should turn red to indicate unsaved data. [Reference Picture]
  4. At the top of HxD, select Save to save your PRODINFO changes, and then exit HxD.

Restoring Modified PRODINFO

  1. Open NxNandManager on your PC again. Go to File, and select Open File.
  2. Open the PRODINFO.bin file you just modified with HxD. Right click on PRODINFO in the left pane, and select Encrypt & dump to file. [Reference Picture]
  3. Select a folder (any folder you can find later) to dump the encrypted PRODINFO to, and hit OK. You should find a PRODINFO.enc in the folder you specified.
  4. Select File in NxNandManager, and then select Close file/drive.
  5. Select the File tab again, and select Open Drive
  6. Select your emuMMC partition on your SD.
  7. Select PRODINFO in the partition list on the left pane.
  8. On the right pane, select Restore from file. Find your PRODINFO.enc file, and open it. [Reference Picture]
  9. Accept the prompt to write PRODINFO, then exit NxNandManager.

Finishing Up

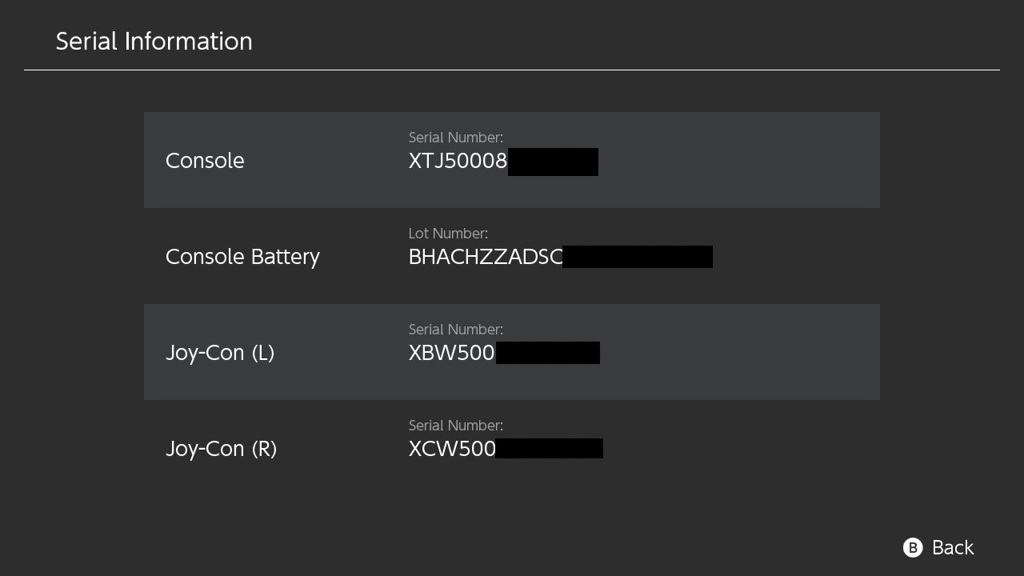
You should now have a USA WiFi region code in your emuMMC's PRODINFO, allowing you to use the same channels as USA Switches. Boot into Hekate, and launch emuMMC, then try connecting to any 5GHz network you weren't able to before.

For example, my 5Ghz network on Channel 165 now works fine:


The sigpatches are now up to date.

Get them at the usual site: https://sigmapatches.coomer.party


Update October 24th, 2023: This is now unnecessary, as patches have been released for 17.0.0. if you are on 17.0.0, I recommend updating your sigpatches instead of downgrading.


Disclaimer: While these steps should be safe, I am not responsible if you mess up your emummc, or have save file compatibility issues by downgrading from 17.0.0. Your console is your responsibility.


To start, you may have noticed sigpatches do not support FW 17.0.0 yet. This is due to significant changes in the FS module in 17.0.0 that are breaking current methods of generating FS sigpatches. We are still waiting on the changes to be researched and new sigpatches made.

If your emummc is on 17.0.0, either by you upgrading it without knowing better, or because your sys was on 17.0.0 when you made the emu, you will need to downgrade to 16.1.0 for working patches.

Note that you DO NOT need to run AMS 1.5.5 for sigpatches to work on FW 16.1.0. While the sigpatches do not support 1.6.1 or 1.6.0, the Sys-Patch sysmodule included with the sigpatches does support patching LDR on any AMS version. Thus, running AMS 1.6.1 with emuMMC 16.1.0 is perfectly fine to do.

Note 2: I do not recommend downgrading your sysMMC (due to it being ban-bait, and mismatched fuses), unless you are running a banned switch with a sysCFW-only setup and upgraded on accident. If you have an emuMMC, you should keep the emu on 16.1.0 and leave your sys on 17.0.0 if it is already updated.


Let's get started:

  1. Download firmware 16.1.0 from Ecchi's Firmware Archives: e.cchi.me

  2. On Ecchi's website, click "All-Purpose Mirror Service", then "archive" -> "nintendo" -> "switch" -> "firmware" and download "Firmware 16.1.0.zip"

  3. Get your SD card from the switch, and create this folder on your SD root: Firmware 16.1.0. Extract the contents of the zip file to the folder you just created. Place SD back in system, inject Hekate, and boot emuMMC using Hekate 6.0.7 + AMS 1.6.1.

  4. Open HBMenu via the album if you do not have any working titles. If you do, launch via title takeover instead by holding R while opening an app/game.

  5. Launch Daybreak in HBMenu.

  6. Tap on "Install" and navigate to /Firmware 16.1.0 on your SD. Tap on "Continue" and then "Preserve settings".

  7. If it is available choose "Install (FAT32 + exFAT)", otherwise "Install (FAT32)" and then "Continue".

  8. Wait until Daybreak completes installing your firmware.

  9. Once it completes, it will ask if you want to reboot. Tap "Reboot".

  10. Once rebooted, launch into emuMMC again and verify your system works. You can verify your system has been properly downgraded in Settings -> System. The version string should now be 16.1.0 | AMS 1.6.1 | E.

If you don't already have them on your SD, you can grab the latest sigpatches from the usual sigmapatches.coomer.party site. Simply extract the contents of Sigpatches.zip to your SD card root, merging and replacing files when asked.


Update October 17th, 2023 - This method is now outdated as of Atmosphere release v1.6.1.

Atmosphere now automatically corrects the indexer save file causing issues on emmc-rebuilt and syswiped consoles. Thus, if you have trouble with booting into OFW, simply update AMS to 1.6.1 and Hekate to 6.0.7, and boot into SysCFW once. Atmos will correct your OS if issues were found, and OFW will work again. See the update guide, PC method here: https://rentry.org/UpdateCFW#pc-method

Also, see Scires' in-depth explanation of the issue here: https://gist.github.com/SciresM/2ddb708c812ed585c4d99f54e25205ff


OLD Unbrick Guide:

If you cannot boot to OFW after updating to 17.0.0, or face an error with the title id: 0100000000000005 in SysCFW, and you have performed a system wipe or an emmc rebuild in the past, follow the instructions below.

IF, AND ONLY IF your issue is EXACTLY the one described above, you may:

  • Inject TegraExplorer, go to "Browse EMMC" > "SYSTEM" > "SAVE" > "8000000000000120"
  • Select "Copy to clipboard"
  • Go back to the main menu
  • Select "Browse SD" > "Clipboard -> Current folder"
  • Go back to "Browse EMMC" > "SYSTEM" > "SAVE" > "8000000000000120"
  • Select "Delete file"
  • Boot sysCFW with Atmosphere 1.6.0 and Hekate 6.0.7 (Important, you need to boot SysCFW at least once after deleting the 00120 save to make OFW work again, since this triggers the system to regenerate and index the missing file.)

Scires' comments regarding this issue

Credits to JeffV @ Nintendo Homebrew Discord for solution.


With freeShops going down, the only access to Switch games we have now is via Pro shops, torrent trackers, Usenet, and DDL sites - riddled with ads, link shorteners, popups, split files, and shitty file hosters.

This guide's aim is to help those who want use the DDL approach. Perhaps you don't have a VPN and can't use torrents, don't want to pay for usenet, or simply can't find the content you want on trackers you have access to. In that case, you'll be forced to use DDLs to obtain content.

First, here are a few common DDL sites that host nsps and xcis, ranked from most to least reliable:

To mitigate the issue of ads, link shorteners, and split files, we'll be using the following tools and browser extensions:

  • uBlock Origin
  • FastForward
  • JDownloader2

uBlock will block those pesky ads, FastForward will skip the malware-infested link shorteners, and JDownloader2 will automatically download and unpack all file parts for us.

I recommend using Firefox Browser for this, since uBlock Origin is more robust and can block more content on pages than the Chrome version. However, Chrome/Chromium forks work too.


Let's setup the extensions:

First, download and install uBlock Origin:

Next, we'll get FastForward installed, grab it from your browser's extension store as well:

Both uBlock and FastForward already have sensible defaults, so you can leave them as is. However, I like to enable the Annoyances filter in uBlock as well to block annoying popups and cookie notices.


Next, we need our download manager. Grab JDownloader2's Adware-Free setup exe: https://jdownloader.org/jdownloader2

Make sure you get the installer from this page, and not any other page, in order to avoid the adware-version installer. Run the installer and install JD2.

You can configure download location and such for JD2 in the settings. I advise enabling the Clipboard Monitor so that JD2 can automatically add links you copied into the download links list.


Now, for the fun part - choose a DDL site to use. I recommend NXBrew for this, as it tends to have links updated more often, generally hosts files that will pass NCA signature verification, and has working search. NSW2U's search is currently broken, and their file quality/links can be hit or miss. Ziperto is often missing newer updates and games, and their files are also hit or miss.

Search up the game you want and find its page - Here you'll find a bunch of links, obfuscated by link shorteners like ouo or 1link. You can try copying the shortened link for each file into JD2 to try and have it parse the link to the destination file, but you'll often run into Cloudflare protection errors.

If you can't directly paste the shortened link into JD2, instead simply click on the link in your browser. This is where FastForward comes into play - you'll notice that garbage like 1link(dot)club get bypassed and you'll end up at the file hoster's page.

Now you can simply highlight the URL bar, and copy the link into JD2. Rinse and repeat for each part of the game, plus the update and DLC. You'll notice that parts will be grouped into a "Package" by JDownloader2 - after you add all the links into JD2 and click start, JD2 will download all files and parts, and then unzip them for you - you don't need to mess with any rar parts or anything like that! You'll find your files in the download location you set in JD2.


A quick note about 1fichier - they have started adding a 1 hour cooldown timer in between file downloads. This means that if you have 5 files from 1fichier, it will take you 4+ hours to download them all consecutively. Parallel downloads from one IP are disallowed. Thus, it may be wise to intersperse 1fichier links with other hosters. For example, if a base game is in two parts, grab the first part from 1fichier, and the second part from an alternative hoster. JD2 will still be able to package the files just fine.

Another note about 1fichier and file hosters in general: A lot of them like to screw over VPN users, and will limit your speed if you use one. If you run 1fichier downloads on a VPN, you will get about 100KB/s. Thus, I recommend you turn off your VPN when downloading using DDL file hosters, even if you have a VPN subscription. This is generally safe to do, as unlike public torrent trackers, your IP address is not visible to anti-piracy bots.

~v1.1~ ~-~ ~Updated~ ~October~ ~16,~ ~2023~

[–] Sanrasxz@lemmy.dbzer0.com 1 points 1 year ago (1 children)

I agree, this entire thing looks very blown out of proportion to me. It's not the first time and not the last time there will be malware in a brand new game torrent on 1337x.

This exact situation has happened before with a new game torrent that had malware, torrent eventually got taken down, and nobody raised a huge fuss other than not to download that torrent.