raspberrypi

3122 readers
1 users here now

Community about the single-board computers, micro-controllers and related projects.

https://www.raspberrypi.com/

Other RaspberryPi communities on Lemmy

founded 4 years ago
MODERATORS
26


Is this possible at all?

27


I recently acquired a Raspberry Pi 5, but I've been having a lot of difficulty in getting LUKS encryption to work. Has anyone had any luck?

Also, I am using an NVMe drive, so Raspbian is really the only OS that works well. NetBSD can see the disk, too, but I found it annoying to use; and FreeBSD ended up breaking itself. I have not yet tried Armbian.

28
29
1
submitted 4 months ago* (last edited 4 months ago) by HumanPenguin@feddit.uk to c/raspberrypi@lemmy.ml


This is independent of other projects I have asked for help on. I'm just looking for anything done similar to my plan.

I am visually impaired. So tend to find most laptop pi projects way to small for common use. But also want an experimental bed for pie projects and experiments in genral.

So my idea is. I'll get a aluminium briefcase like case. Mount a 18 plus inch portable USB c powered display into the lid. It would also be nice if I could have my 15inch display fold out on a vesa mount. As an extra.

Inside the case id like to mount a large 18650 or similar lifepo4 batt. I'm thinking 4s 4p with a BMS so I can power usb 100w output with a 12v hub. This should allow out put to multiple monitors and a pie or 2.

I have a great small wireless keyboard and mouse. That could be popped in and out.

For the main board currently I'll use my waveshare CM4 poe board b with my 32/8 gb cm4.

But long term the itx cluster board looks good. When I have a bit more cash.

The main idea is it will allow me to connect multiple pcie riser cables to the boards via a 4 way wave share pcie switch to start with. Providing space to mount different boards and options as I change projects.

As folks may have seen from other projects. I move between home and my tiny narrowboat I share with my brother. So this will be more about being able to port multiple pie projects as much as being a usable PC type thing.

So if anyone has seen or worked on a project that may point to cool ways to mount this. I'd love to see them.

As I do not have a 3d printer. And cannot really argue the value for as rare as id use it. I am thinking alliminium plate cut and riveted to mount boards etc to the inside. But would love other ideas folks have seen or can come up with.

30


I've been using Chromecasts and it's gotten so slow and buggy. I was trying to cast from VLC on my phone to it and I had a ton of trouble getting it to show up and connect and after I finished streaming from my phone I tried to switch to the YouTube app and it just kept on crashing.

It's 2024, I'm tired of dealing with shitty tv streaming experiences. I want something completely uncompromising. I want a silky smooth experience and I don't want it to randomly break on my.

I'm thinking about shelling out for a shield TV, but I'd rather have control over my device since I don't want to deal with the manufacturers fucking around with my device after the fact.

I'd love to be able to set up a raspberry pi for this, but would I be able to get a seamless experience? I don't mind doing extra up front work to get it set up, but I don't want it to be an ongoing maintenance thing, and I'd like it to work with Chromecast so it's easy to stream to from a variety of devices.

Can I actually pull that off with a raspberry pi or should I go with the shield TV?

31


My laptop is having a tantrum and seems like it needs a hard-drive replacement. Not a major issue, I've been thinking about switching to a SFF Desktop for a while.

But the issue is, I have a brand new Raspberry Pi Zero 2 W that I want to install PiHole on to.

So, I grab an old phone, LG G6 and install Etchdroid, download Raspberry Pi OS from the official website and the phone keeps having a tantrum and switching the SD card adapter to charging only. I try a second adapter, still no joy. So I think fuck it, maybe the phone is too old.

I grab a newer phone, Pixel 6 Pro and attempt the same thing again and encounter the same problem again. No matter what, I don't seem to be able to flash this OS from Android.

Anyone know of a way to get me over the finish line without me having to buy new hardware?

32
33
1
submitted 4 months ago* (last edited 4 months ago) by HumanPenguin@feddit.uk to c/raspberrypi@lemmy.ml


Sorry I am expecting no here. But cannot help but hope someone knows a way around the limitation.

I have a project where I plan to use an nvme on a waveshare mini b io board.

I am just now learning my way around CM4 pies. So purchased a few parts to experiment before fitting to manage stuff on my boat.

Unfortunately I did not know enough whan I got the dev cm4. Seeing as the cost difference between Emmc and lite was tiny. I decided there was little to lose with getting a Emmc one. Not knowing the EMMC uses the same pin address as the SD slot on io boards.

I now know this will mean the SD card port is not available. As I plan to use that to move software updates.

I was wondering if anyone knows a software way of enabling the internal sd port. IE basically disabling the EMMC.

If not ill just set up with a USB SD reader so all my cm4 can run identical. But if I can use the one on the board. It will be simpler. Maybe have some option to reboot the boat cm4 in either option with an emergency os on the emmc in the event of a fault.

34


In December 2017 I set up a Raspberry Pi Zero W (v1.1) with a bash script to automatically launch Chromium browser at startup in kiosk mode, wait 2 minutes, then use xdotool to change tabs.

Browser was configured to launch with 2 tabs. One was a locally hosted (static) HTML file, the other was a Google Slides slideshow. HTML file displayed a welcome message and current time (via css clock) while the slideshow loaded in the background tab.

This was working flawlessly for years.

Here's my problem
If the display was showing desktop background instead of clock/slideshow I would just SSH in and reboot to fix it ... but over the last 6 months, this "reboot fix" reliability of launching the Chromium browser has fallen off a cliff... From 100% to 50% to 10% then basically 0%

I suspected the latest version of the browser is not supported on this old Zero W ... So I formatted the SD card, burned the 32-bit Legacy version of Pi OS (bullseye) for the Zero W using imager and confirmed my suspicions.

I almost fixed the issue by launching Midori in Fullscreen mode instead, but it's displaying the navbar for some reason. Am I missing something?

For this simple use case, would I be better off running 32-bit Pi OS Lite and an X11 window manager? How?

35


Hi everyone, every time I setup a Pi project server I have a hard time since I can only access that device from the computer where I created the image since I add the SSH key during setup, but I would like to be able to ssh from my android and my other laptop in case I'm out on the road and away from home.

How can I add the other keys for the other devices to a single Pi without using the user name and password as this is also given me problems because ssh wants to try using keys and if it does not find them it just fails instead of asking me to enter the password (also, because it's not really safe).

36
37


I wanted to share my most recent delivery from AliExpress, an MCUZone MPS2242-POE A hat for my Pi 5, that combines an NVME controller, and POE circuitry. I couldn't find any info on these before buying, so I thought it would be good to share with the raspberry Pi community here.

I think these hats would be useful for merging the functions of both devices if you were planning to buy them anyways. You can already get the same functionality of this with combining a NVME base (ex. Pimoroni) with the Waveshare POE hat, but I didn't think the combo would fit in my little 1U pi rack, since the base adds some height (see attached photo album for checking our the sizes)

Costs seem similar to buying the hats separately, this combined hat was 3,980 yen with shipping for me, and the waveshare POE hat was about 3000 yen, plus 1500 yen for a NVME base (costs might be more or less depending on where you're shipping it to, I'm in Japan).

It supports disks of 2230 or 2242 size only. In the case of 2230, there's no standoff included for the hole, and you need to supply your own. I used a small bolt (M3 I think) to fix my 2230 disk in place. This hat does block the CSI/ DSI port, but there's a B version that has holes in the PCB so you can use these plugs, but it's taller then the A version I bought.

There's also a USB-C port on the board, I initially though this could be used for mounting the drive on another machine, but it doesn't seem to work for that. It's just there to supply power to other accessories (5V 3A according to spec-sheet)

I only installed it earlier today, but as a first review it works great. I have my Pi setup with two USB devices (zigbee stick and connection to a UPS) and power is working fine.

The tricky part for me was moving/ installing an OS on the NVME drive, as I don't have a NVME to USB reader to access the NVME disk from the normal raspberry Pi Imager tool I use on my laptop. To anyone in the same position these steps will work with any NVME hat for the Pi 5 to install:

  • Create a generic Rasperry PI OS image on any microsd card, then boot that up from the on your Pi 5 with NVME hat installed.
  • Use this environment to update the EEPROM, which depending on your version might be necessary for the NVME hat to work.
sudo rpi-eeprom-update
sudo raspi-config
  • You can then use the built-in raspberry pi disk imager tool to install whatever you want with the NVME as a target, or if you have an existing Pi 5 image you want to copy over you can do so with dd to clone it (In my case this was a Home Assistant image), as long as you can plug in your existing microSD card with a USB reader to the Pi5 so it can access both disks. (Check the names of your disks with lsblk)
sudo dd if=/dev/sda of=/dev/nvme0n1 status=progress
  • Once this is done, shutdown the pi and pull the microSD card (and USB microSD adapter if you were using one). If everything worked you'll boot up into your NVME environment. You can also use the raspi-config tool to setup nvme boot as a priority over microSD boot, but I left mine as default in case I need to go back to another OS quickly for any reason by just plugging in any old microSD installation.

Hope this info is useful to people here! If there's any questions about this guy let me know.

38
1
submitted 5 months ago* (last edited 5 months ago) by HumanPenguin@feddit.uk to c/raspberrypi@lemmy.ml


Hi again folks.

I am looking at a small project. Once again for my boat.

As this one really has very little need to write. Just regular temperature logging with time from multiple sources.

I am considering setting the pie to store all temporary files in memory. Running the main os from the SD card. And just using an extra USB storage for logging temps etc.

This should hopefully leave the system needing very little maintainance. With just the USB flash drive prown to wearing out every couple of years.

I'd be greatfull for any links to folks who have set up similar systems.

Or other ideas on safe low maintainance ways of running a pi zero os.

39


Hi. I am looking at using a cm4 and Waveshare mini io board. For a project I am setting up on my small narrowboat.

As the tiny antique single cylinder diesel engine. Means the boat suffers from a fair bit of vibration. And this will be the first time I have used a CM4.

I was hoping some folks could share there experiance/advice on using CM4 boards in similar rough environments.

I am planning to build a system mounted to din rails with rubber pads to absorb some of the vibration. But any other experience other have can only help.

40


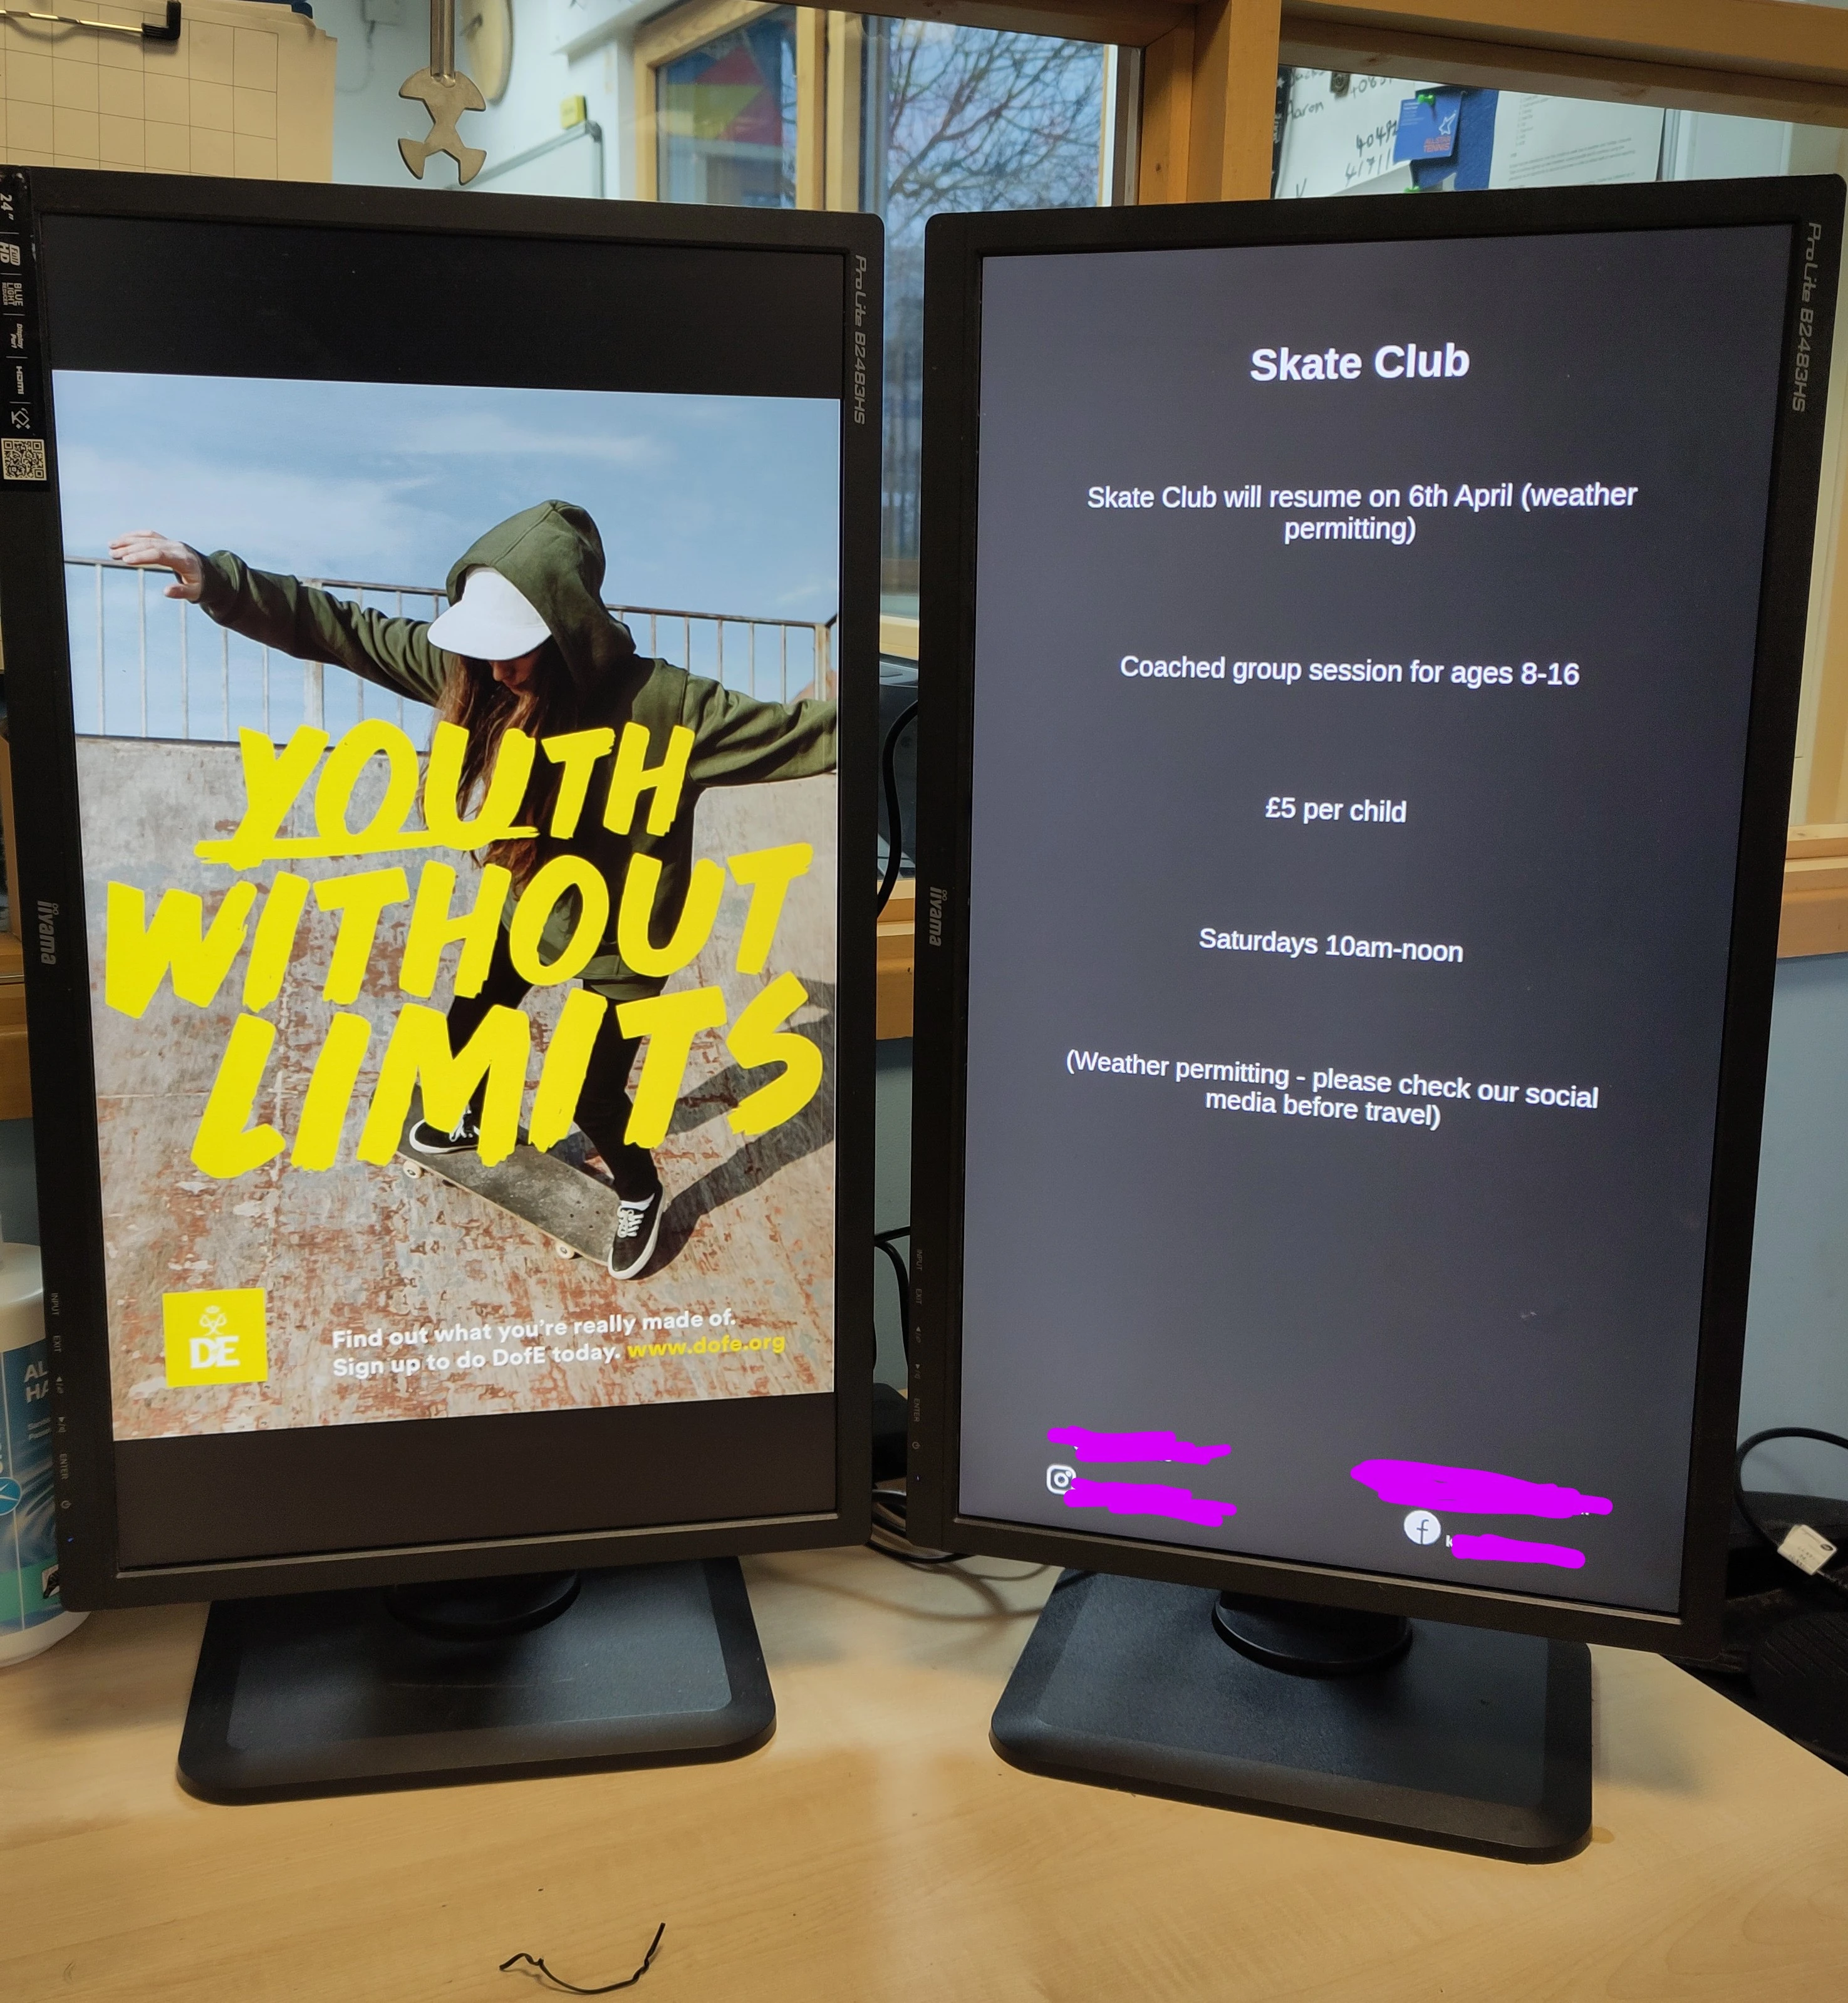
Pi4 1gb, posters on left with feh, info board on right which is a html file running on chromium

41


I'm sorry if this isn't the place to ask this, I also asked over at !python@programming.dev.

So what I want to do is this: Two RasPis are at different locations. They're on different networks but have internet access. Pressing a button on one of the Pis turns on an LED over at the other Pi via GPIO. How can I make the communication work? My first thought was Telegram bots as I'm familiar with those for notifications but you can't have Telegram bots communicate with each other, sadly. Is there a good (and secure) solution to this? Preferably using Python code and without continuous costs like server hosting, etc?

Thanks!

42
1
submitted 5 months ago* (last edited 5 months ago) by retrolasered@lemmy.zip to c/raspberrypi@lemmy.ml


Instructables sucks and my github's a mess, so I'm just going to post this here, so Lemmy exclusive I guess..

Before starting you will need an rpi 4b, after monitoring over ssh I'm pretty sure a 2gb model will be enough, the RAM usage didn't really get much past 1.7gb, I used an old 4gb that used to be my projects centre. Cooling is advised, you can overclock and get the performance boost that way too which helps a lot with 1080p, although still don't expect to get near that with youtube, go with piped instead. Ethernet and an overclock will get the best performance, although 720p on most sites seems to run okay over wifi. You will want to run from USB storage too, I'm using the M.2 SSD base with the argon ONE case, but I tested on a USB 3.0 thumbdrive and results were pretty similar.

Start by flashing the latest 64-bit raspi lite OS to a usb device. You may need to update the EEPROM if you haven't already in order to boot from USB. Take advantage of the rpi imager settings here to enable SSH and change the hostname so you can tell it apart from the 6 other pi's you have running around your house, if using a different imager then don't forget to include the SSH file you may need it on the next step.

After initial boot, the screen may black out, using the same image I had this happen with the USB SSD, but not the USB thumb drive. If it blacks out then ssh in and vi or nano into /boot/firmware/config.txt and comment out and add the following lines:

#dtoverlay=vc4-kms-v3d
dtoverlay=vc4-fkms-v3d

Now that the screen is working you can log into the session, and make the usual prayer sudo apt update && sudo apt upgrade -y followed by a sudo reboot for luck. And next install KDE Plasma; I originally went for kde-plasma-desktop as its the lighter install, but it kept hanging at boot, you might have more luck, but expect to start again if it fails.

sudo apt install kde-standard

After that another reboot for luck. Then we need to activate the sddm login manager service, and tell raspi OS that we want it to boot into GUI on the next boot:

sudo systemctl enable sddm
sudo systemctl set-default graphical.target

And reboot again. It should now boot into plasma, and the first thing you should do is disable all the desktop effects; older KDE plasma guides suggest to disable compositor, but the session defaults to wayland unless you tell it not to, and wayland can't run without the compositor - I've noticed no major differences between X11 and wayland myself in this use case (don't believe the hype). [edit: have found that disabling compositor in X causes screen tearing on video, so just disable desktop effects but leave compositor on]

Now the effects are disabled, and if you have your cooling set up, now is a good time to overclock, so back into /boot/firmware/config.txt. I just went with the following:

# Overclock
over_voltage=6
arm_freq=2000
gpu_freq=700

Next we can install the other bits we need:

sudo apt install chromium-browser rpi-chromium-mods plasma-bigscreen

If you want to watch DRM services like netflix you will need another package thats not included in lite:

sudo apt install libwidevinecdm0

KDE connect and an android phone make the perfect remote control, connect should already be included in the KDE install. But firewall suggested, with connect and ssh rules:

sudo apt install ufw
sudo ufw allow 1714:1764/udp
sudo ufw allow 1714:1764/tcp
sudo ufw allow 22/tcp
sudo ufw enable

Next open chromium, add the extensions you want, and "install" your "web apps".

Now open up KDE settings again, select Startup and Shutdown > Login Screen (SDDM), and then click the behaviour button at the bottom and set plasma to log in automatically and change the session to bigscreen, password to confirm, and it should prompt you to set a password for the keychain, I set a blank password because I want other people to be able to use the tv. Also disable power saving, or at least getting sent back to the login screen after sleep.

Done! Reboot and enjoy!

Some optional polish:

plasma bigscreen is designed to work one window at a time, so if you minus a window without a keyboard you've essentially lost it, so in settings you can remove the titlebar buttons for max/min and hide and just leave the one to close the window with.

Xscreensaver has a pretty cool analog tv effect screensaver that will cycle through images in a folder and display them with various tv static effects:

sudo apt install xscreensaver xscreensaver-data-extra

[edit: it looks like this version of bigscreen doesn't suport KDE login scripts so xscreensaver for now is a non-starter. Hopefully debian gets plasma 5.26 soon and this will then work]

[added:] Not quite full screen: KDE's window management isn't quite perfect, and full screen often falls short by 1 pixel on the right and bottom borders (despite any window rules you might add), this can be an irritant when a bright wallpaper sits behind whatever you're watching. Easiest fix is to set a dark-edged wallpaper. The newer bigscreen lets you use the kde settings which is nice as you can set the wallpaper to plain colour black, but the debian version you have to use the built in wallpaper settings app found in the settings menu on the home screen. It will only show you the wallpapers that are installed, so download your dark wallpaper, then move it to the wallpaper folder and it will show up in the wallpaper changer application:

sudo mv ~/Downloads/<wallpaper> /usr/share/wallpaper/
43


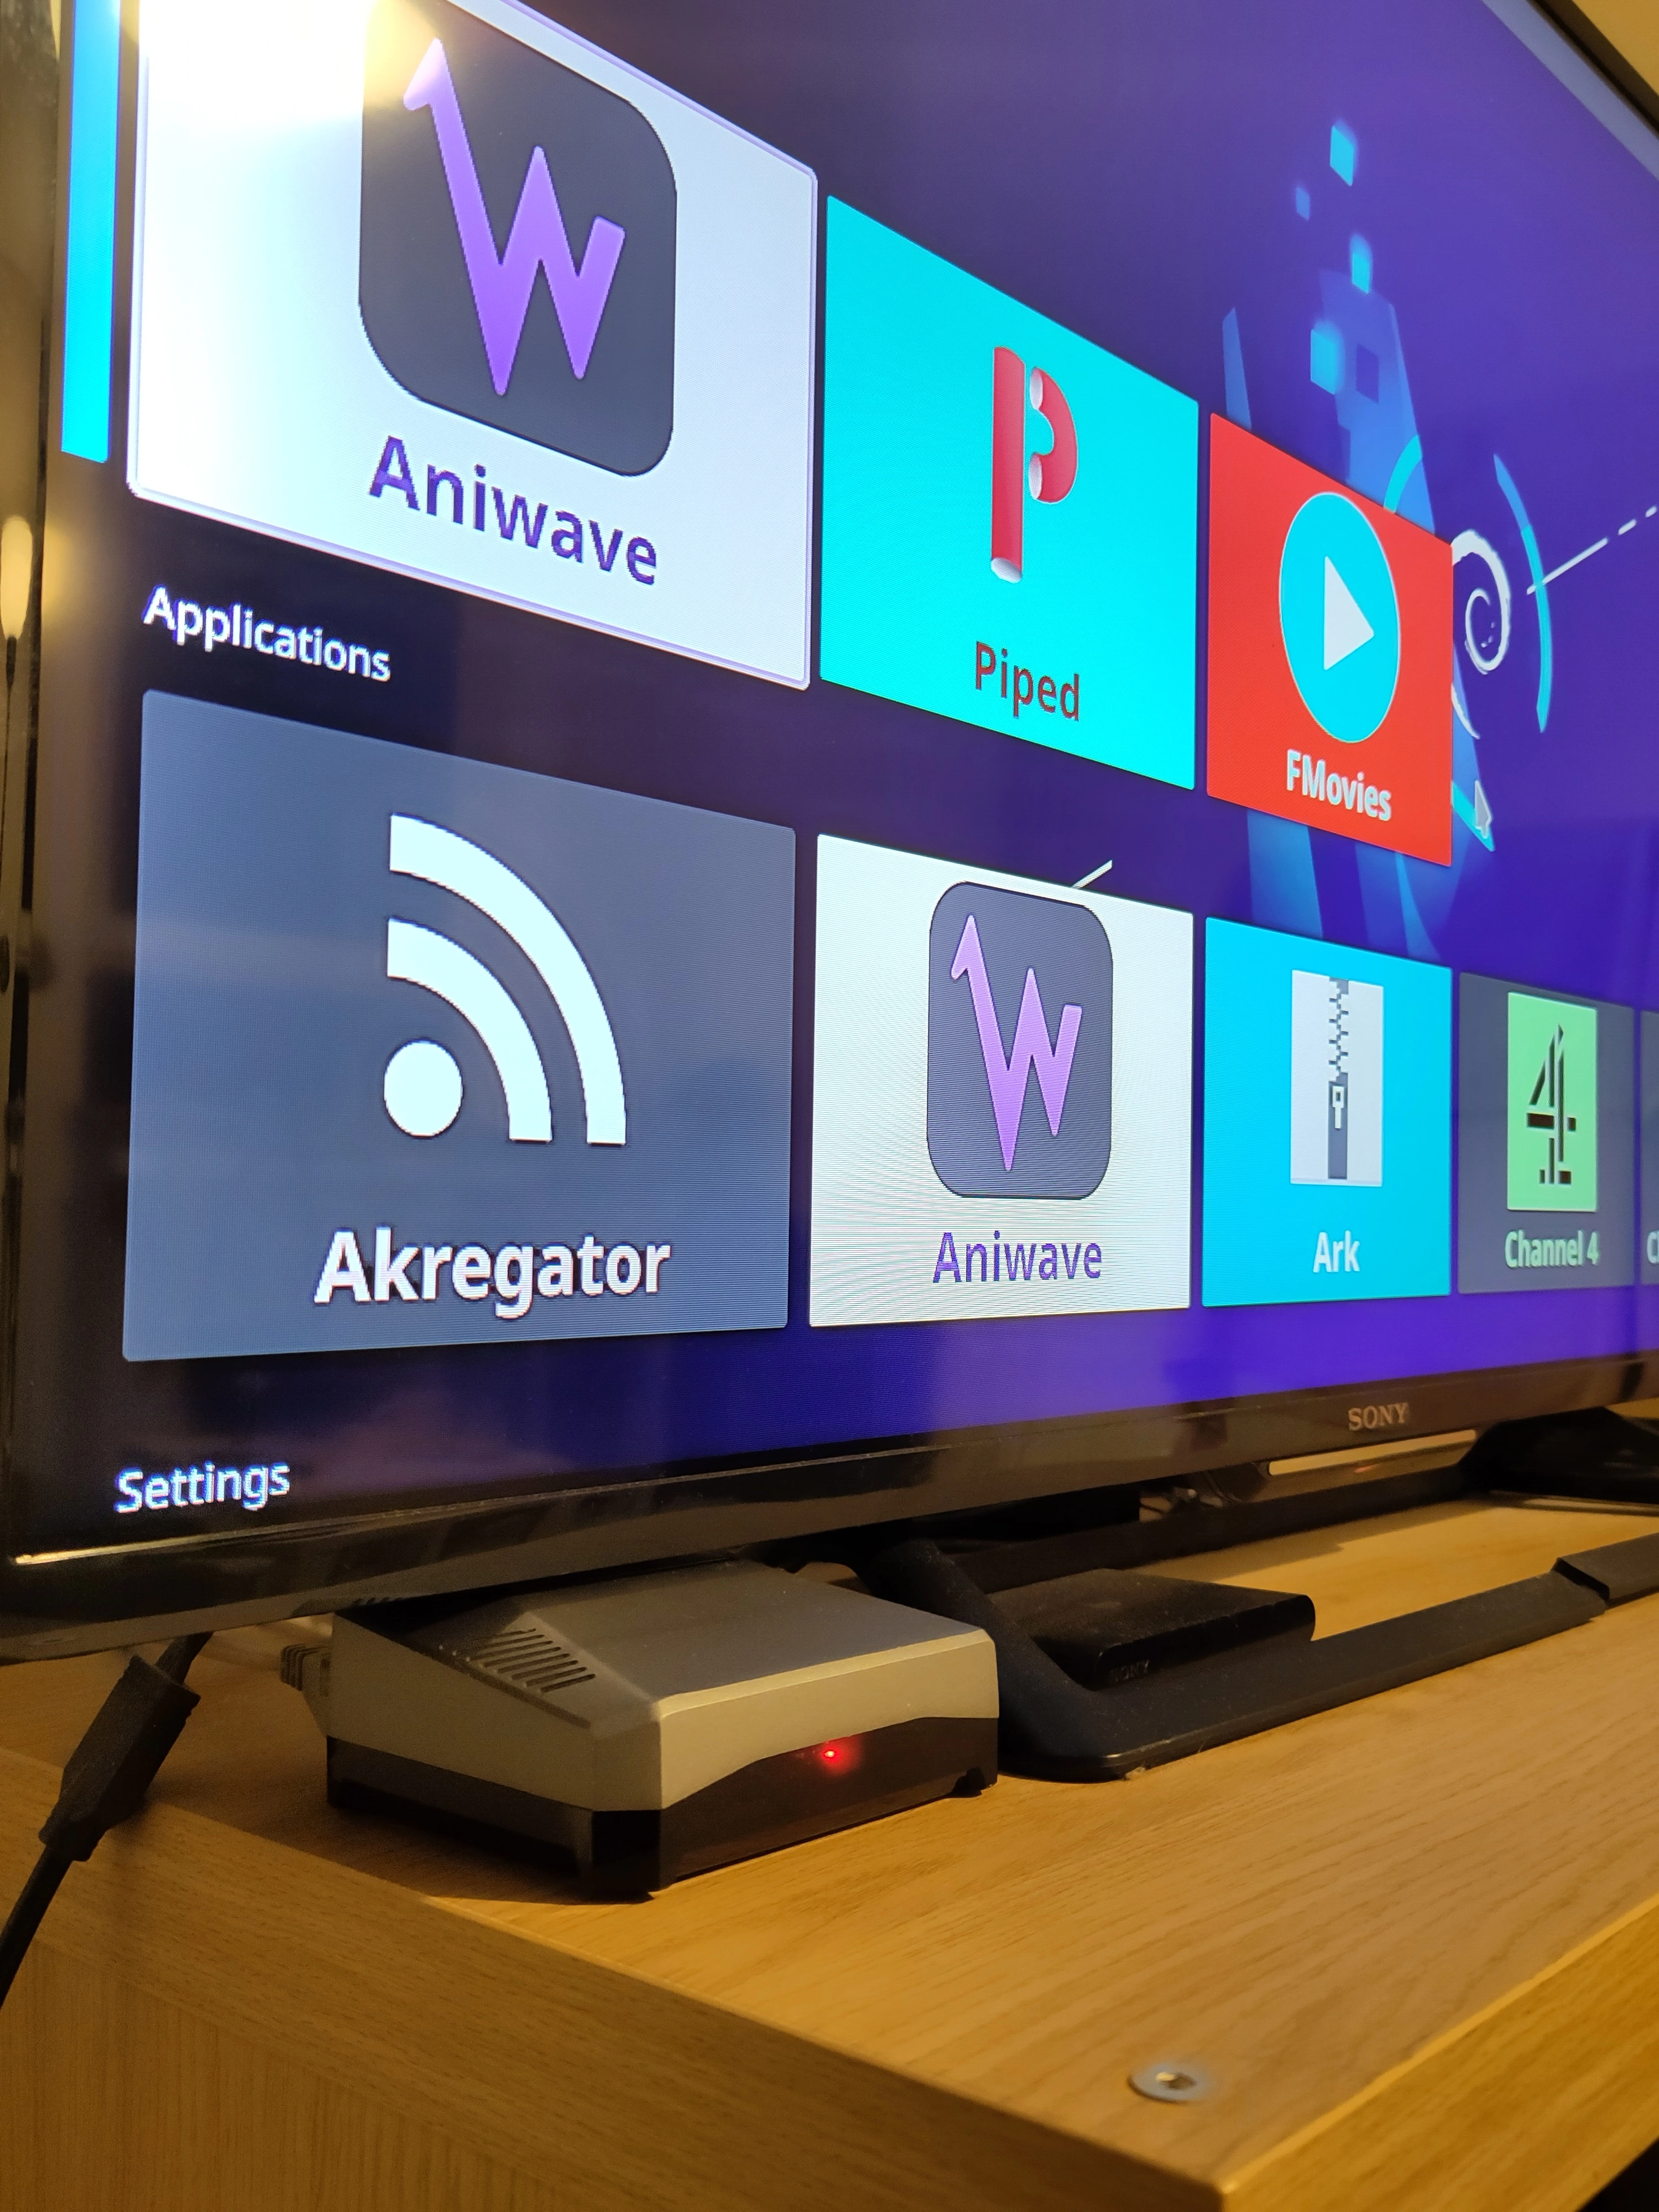
Had been waiting for my pi 5 argon case which got lost in the post before I could set this up. Ive been tinkering with an old SFF PC running arch over the last few months to get a "smart tv" set up going that im happy with, now ive condensed it down into a little debian box that uses a fraction of the electricity. Happy days.

44
45


cross-posted from: https://lemmy.world/post/11673921

I want to build my own portable E-Reader like a Tolino/Kindle in DIN-A5 format (I know there are similar projects, like the Open Book from joeycastillo, but I want to make my own just for fun). I'm considering using the Compute Module 4 from Raspberry Pi. That, at least according to my theories, would have the advantage of me not needing to create my own OS, and the availability of already existing EPUB/HTML (EPUB is essentially just HTML) & PDF parsers and UI libraries hopefully makes my life easier. I don't want to use a default Raspberry Pi, because I don't need all the ports and I want the size of the E-Reader to be not unnecessarily thick.

The modules I need/want:

  • Micro SD Card Reader for internal Storage (or just using eMMC Storage, have not settled yet on that topic)
  • SD Card Reader (large/normal sized SD Cards), with a snap-in/spring mechanism (like with Nintendo (3)DS cartridges)
  • E-Paper Display (e.g. a waveshare)
  • USB-C Port for charging the battery (and maybe, if possible also file transfer and if possible maybe also to connect to a docking station)
  • Battery

What is your experience with the Compute Module (4) and do you have good resources for creating my own PCB extension module for the Compute Module you would like to share? Do you have constructive critique for my project idea?

46


See title. I'm thinking of picking this up to power a pair of speakers but am currently powering my Pi using the GPIO pins. If I install this, will I no longer be able to power the Pi that way? Will I have to use the MicroUSB?

47
48
49


Hello, I’m starting a project to build something for a friends kid who’s father is a Huey pilot. I ordered the switch/panel in the image and want to 3d print an enclosure to mount it on that plays the song when the switch is in the on position.

Per the website the switch is fully functional, I just need to wire it to something to use it. Does anyone have suggestions on a bare bones controller to use and how to set it up to play an MP3 so long as the switch is in the on position? In a perfect world I would love for it to resume the position if it’s quickly toggled but restart if it sits more than a minute or so but realistically just playing the song would be more than enough.

While I’m new to Raspberry Pi I’m not that daunted by the task. I’ve been soldering since elementary school and have a degree in comp sci, but haven’t done any coding since graduating 10+ years ago. I do have a Pi hole but using an off the shelf package on a premade pi with step by step instructions doesn’t really count as “experience” for pi in my opinion.

Any suggestions are welcome, especially if someone can recommend some mini speakers that actually sound half decent. I’m not looking to tear a Bose Bluetooth apart but something slightly less tin-canny than a 2004 Nokia ringtone would be nice.

Thanks in advance!

50


Putting my #raspberrypi to good use by profiling my internet speed over the last six days. Looks like a seismometer at a System of a Down concert!

I am **not** very proficient in programming, but can someone please suggest some nice little projects like this for me, please?

@raspberrypi @raspberry_pi

view more: ‹ prev next ›