Hi everyone,
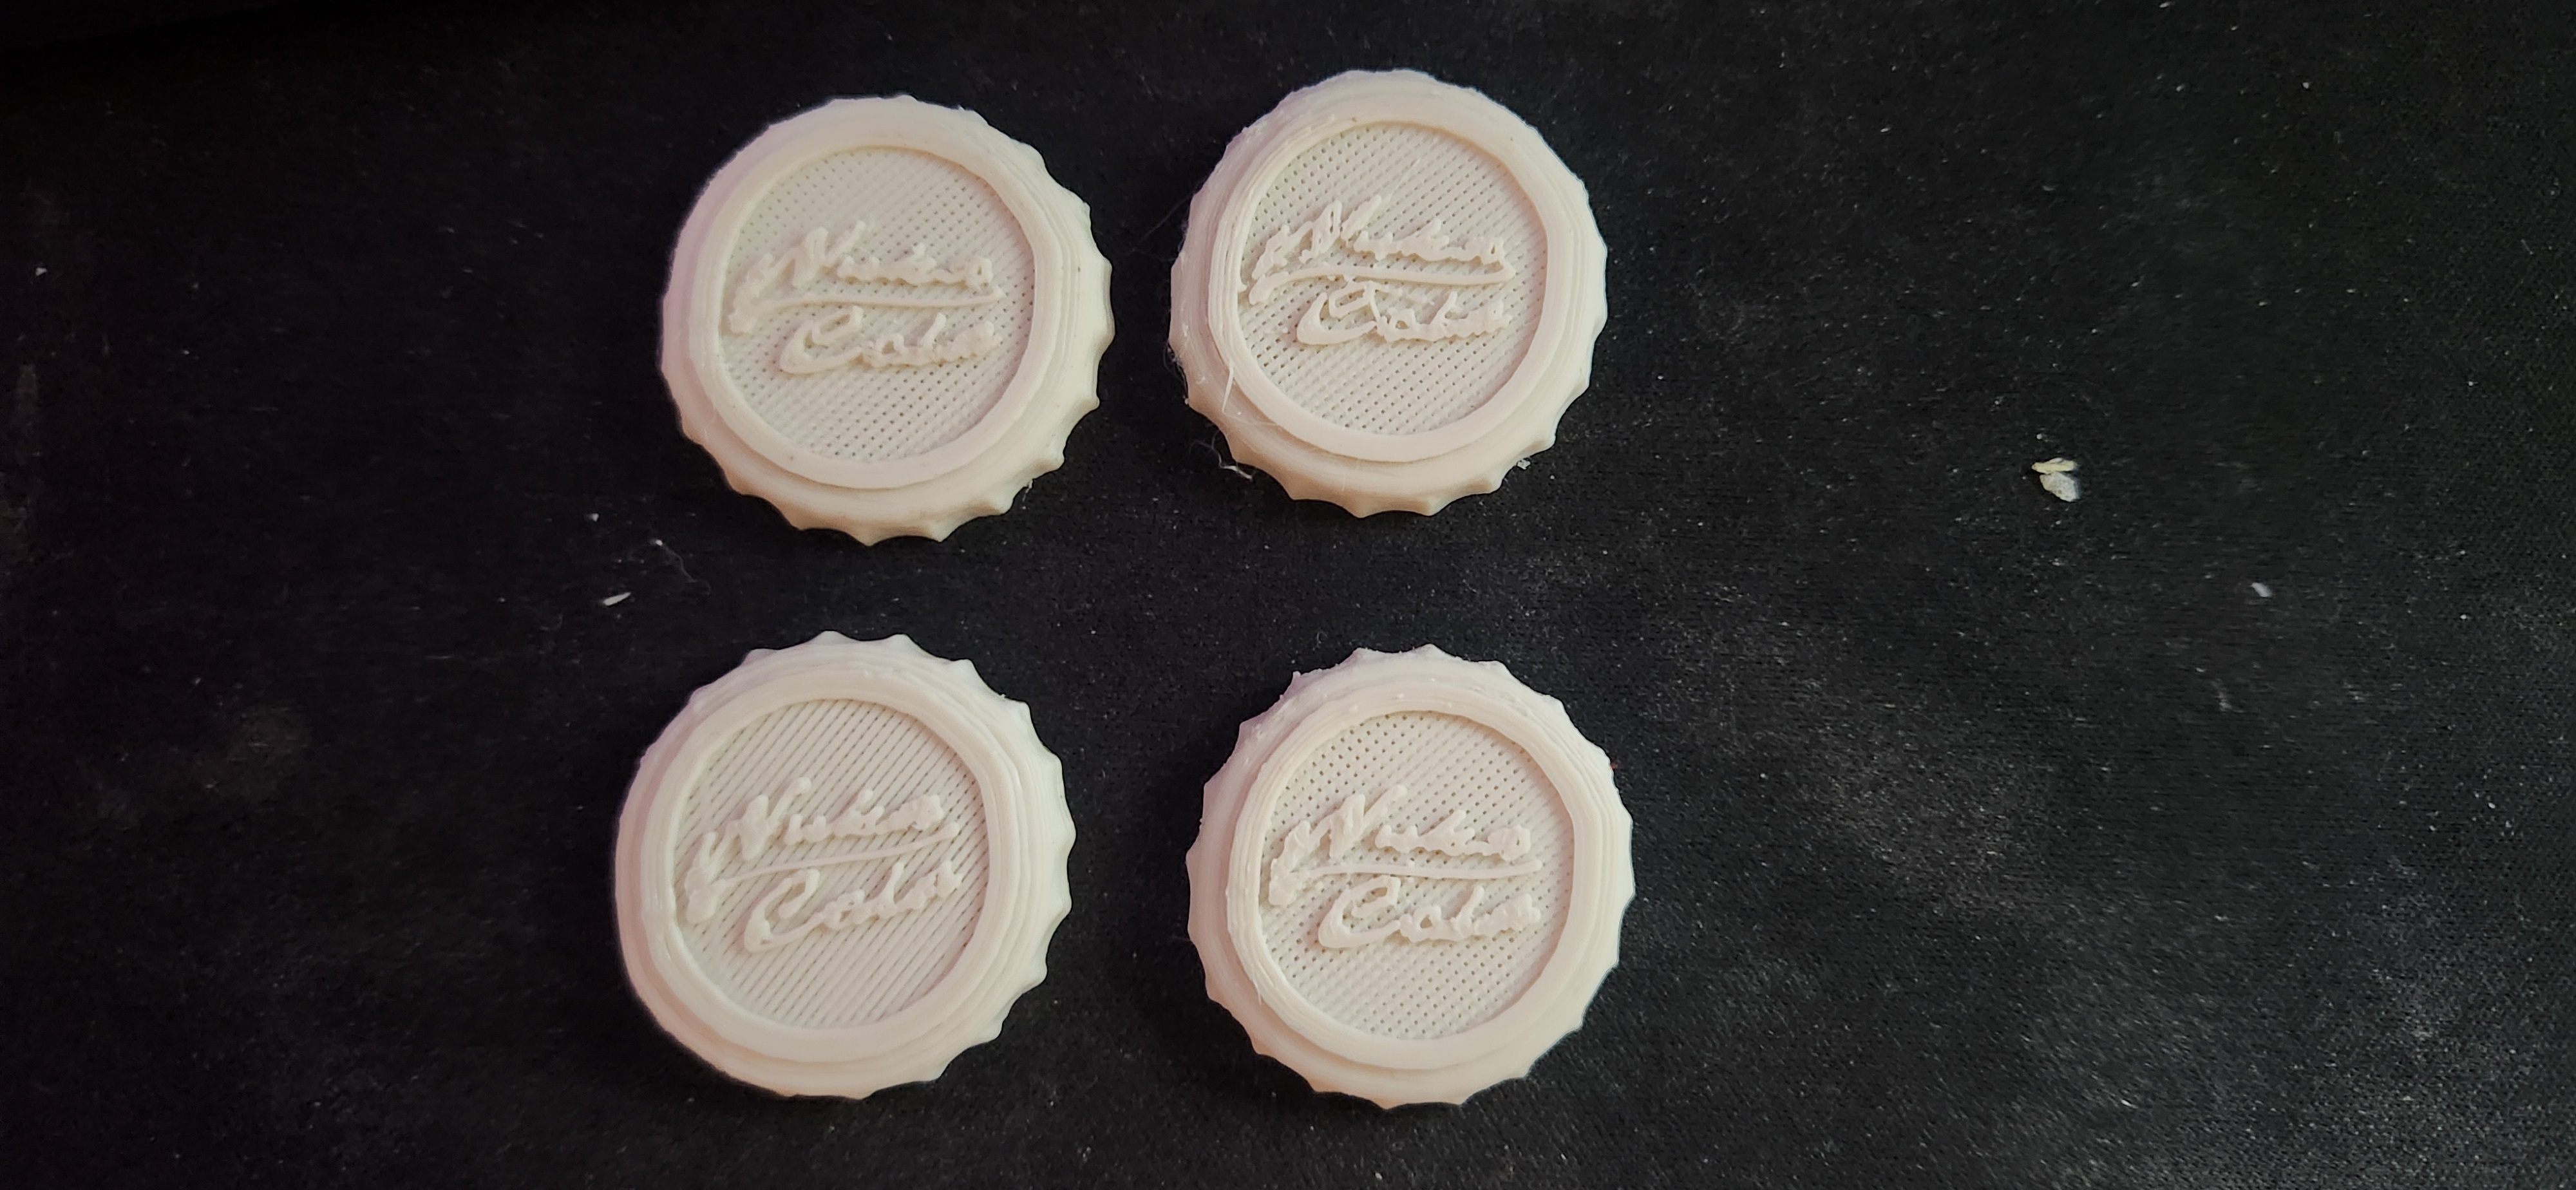
I'm having a weird issue with text such as the one in this image. Big or small, fancy or regular, all text comes out looking like it does in the image - cracked and hollow. I've spent the last few days trying to figure out why, and I'm stumped.
I've tried printing slower and slower and adding more and more top layers (the bottom 2 bottle caps are completely solid with 100% infil), but it doesn't seem to fix the issue.
Here's what I'm working with:
- Ender 3
- Software 2.0.8.27
- Hardware 4.2.2
- CR Touch
- PrusaSlicer 2.8.0
- MakerBot PLA Filament
- I've used various temperatures and speeds. All of them have generated the terrible text you see here
Thanks in advanced for the help!
Update: We seem to be getting somewhere!
The top 2 are the same ones featured in the post above. The bottom left was printed at 110% extrusion and normal speed. The bottom right was printed at 110% extrusion and a much slower speed for the text, and it looks much better! I'm printing another now with higher bridge flow rate (it was 70%, I set it to 85%), so I'll update again in a few minutes when that finishes!
Thanks for the information about calibrating e steps from everyone! It's getting late, so I don't want to mess around with that tonight, but I'll give it a shot tomorrow!
Update 2: welp.

That's possibly the worst one yet. I'm reprinting the bigger insert piece seen in the original post to check if my printer simply can't do that quality or if it's the e steps. If it's e steps, I'm going to bed...
Update 3:
Welp, seems like it's the e-step. However, it's too late for me to care about that right now, so I'm going to bed. Thanks for the help everyone! I'll work on fixing the issue tomorrow
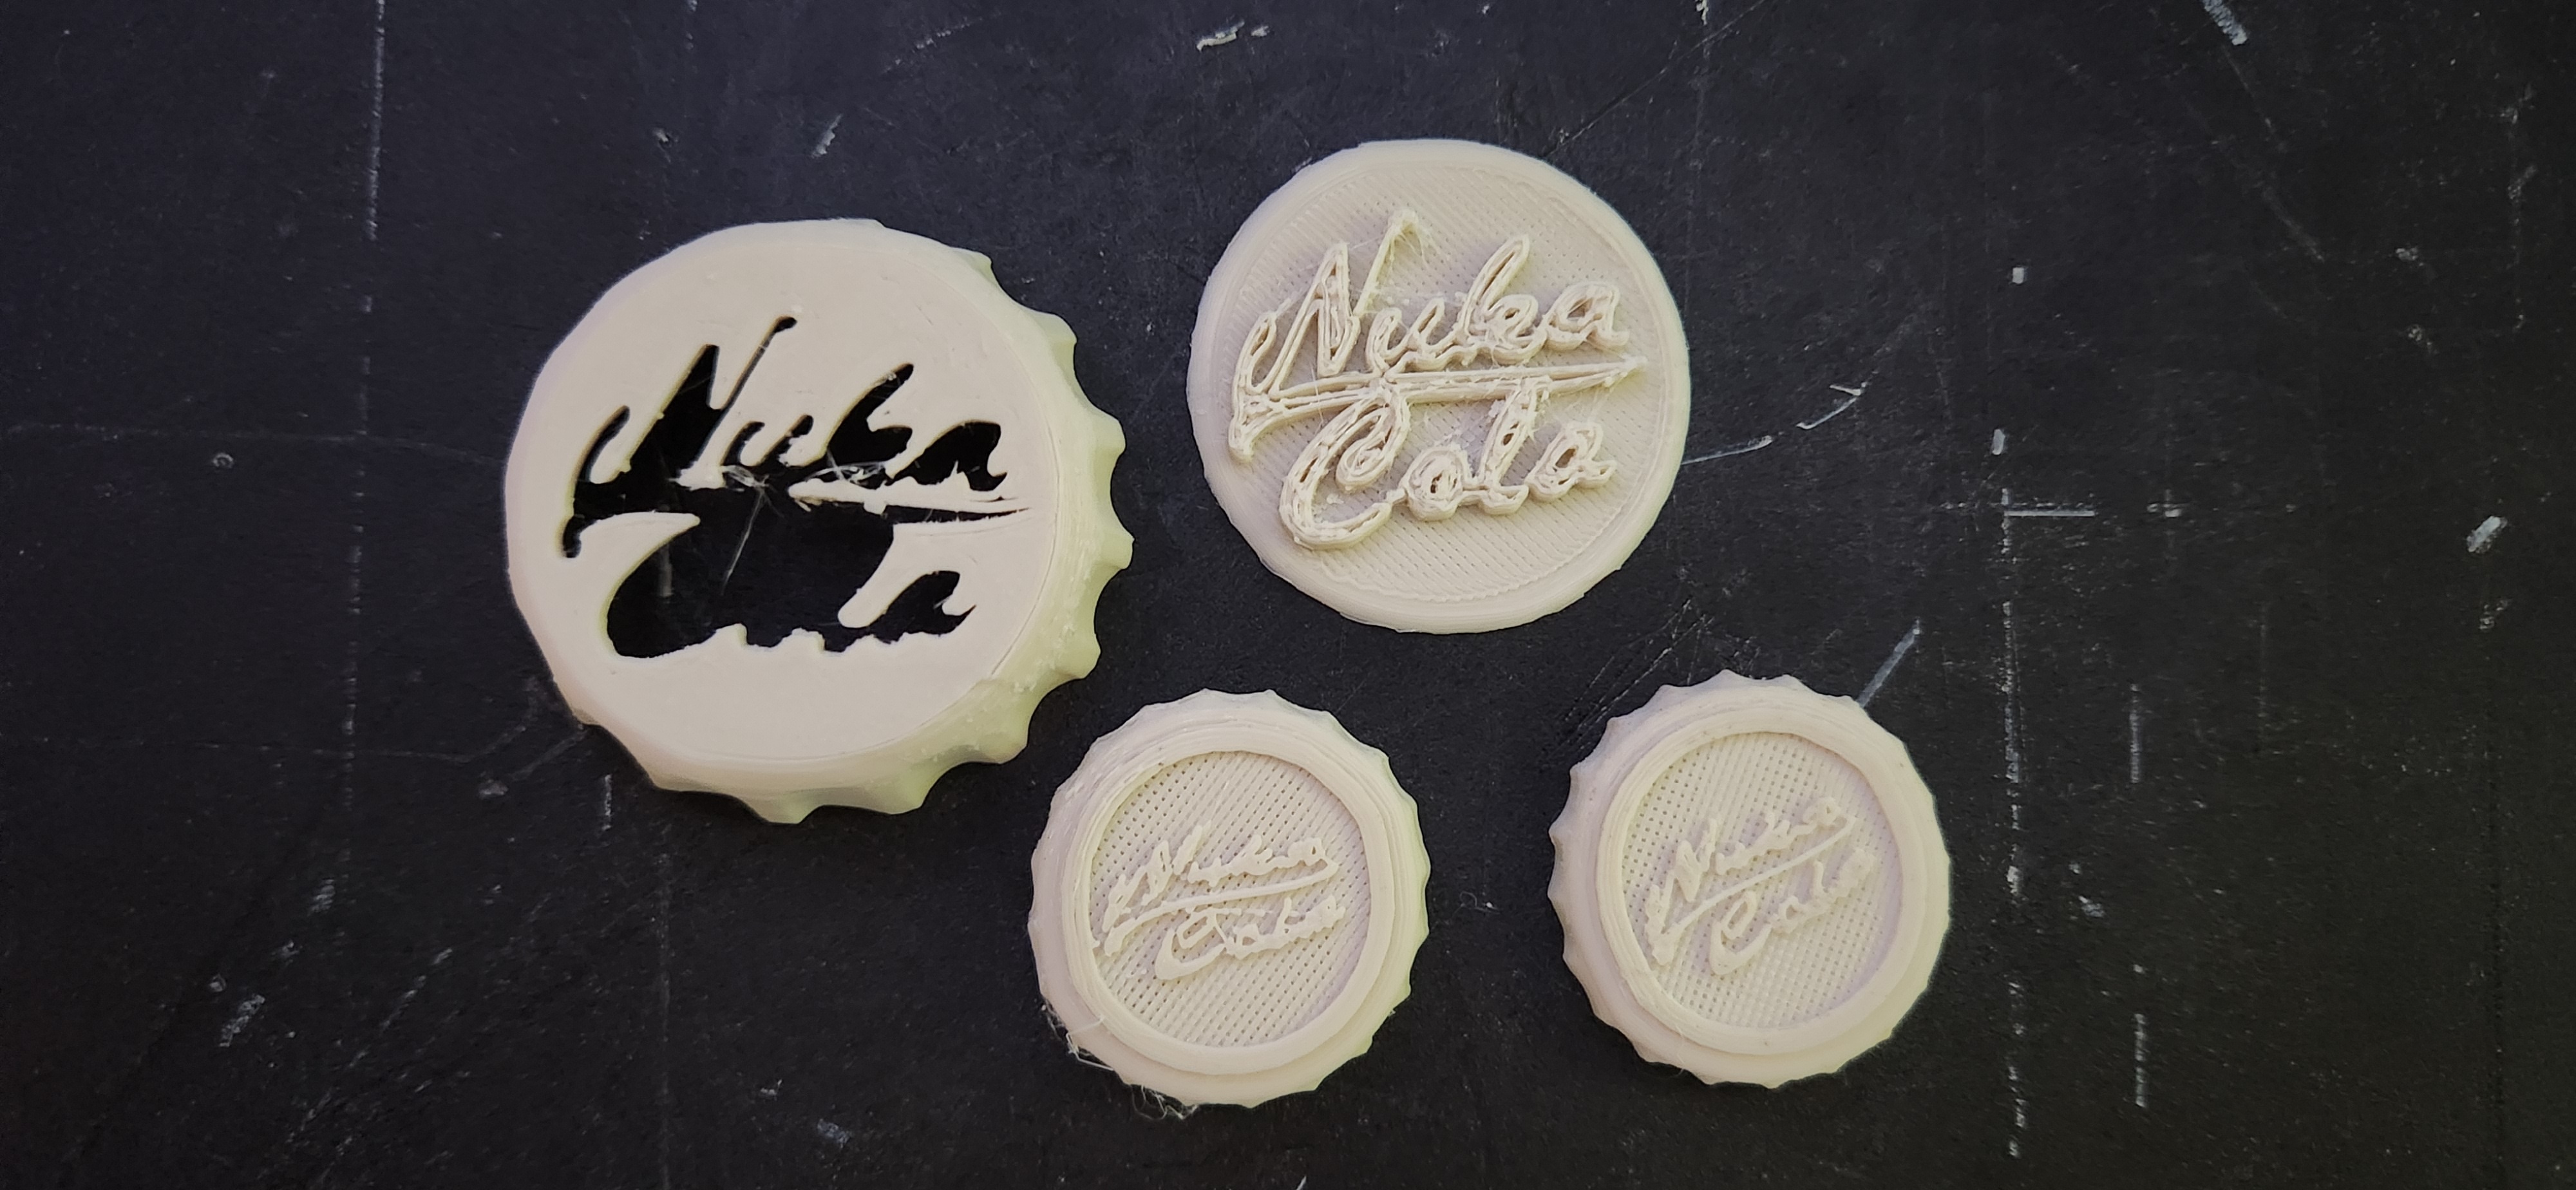
The upper right print, which is the only one that I can really see clearly, looks under extruded on the top layer. You either have a partial clog, your e-stepe might be ore, or if your printer has always produced top layers that look like that with the filament you're currently using you need to calibrate (extrusion multiplier and/or temp).
At a minimum, I suggest double checking e-steps (should take you about 1 minute after your extruder is hot) and your extrusion multiplier.
I would also check the sliced preview. Ideally all the perimeters of the letters can be the same width. If this isn't the case, tweak perimeter width until you get there. I've found this results in the lowest chances of having a gap in the middle of these types of thin multi-walled features.
That said, FDM printers have was more resolution in the z axis than they do on x and y. You will be able to get cleaner text, but there's only so far you can take it.
Thanks for the feedback!
I'm testing the bottle caps on 110% extrusion right now. Hopefully that'll solve the issue, cause I have no idea how to go about following that guide on my ender 3. It just says "use the web interface", which my cheap af ender 3 doesn't have
I personally like https://teachingtechyt.github.io/calibration.html for all of the above. It provides gcode and stl files based on your input. I've had great success using it for my Ender 3.